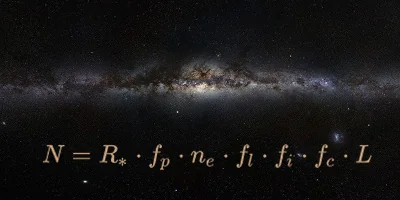
How many technological civilizations exist in the Milky Way? What the origin of life on Earth tell us about the parameters of the Drake equation.
Stellarium is an open source astronomy software capable of rendering the night sky with near photographic realism. One of the features of Stellarium is its scriptability. In this article i will explain how to set up the Visual Studio Code development environment for developing Stellarium scripts in Typescript.
The script API of Stellarium is quite powerfull but there are certain limitations that make writing complex scripts difficult. Stellarium is using QtScript which is an implementation of the ECMAScript specification. The Typescript language is a strict syntactical superset of ECMAScript. It was developed to make working with ECMAScript easier and safer. Typescript code is not executed directly but transpiled into ECMAScript.
The benefits of using Typescript and Visual Studio Code:
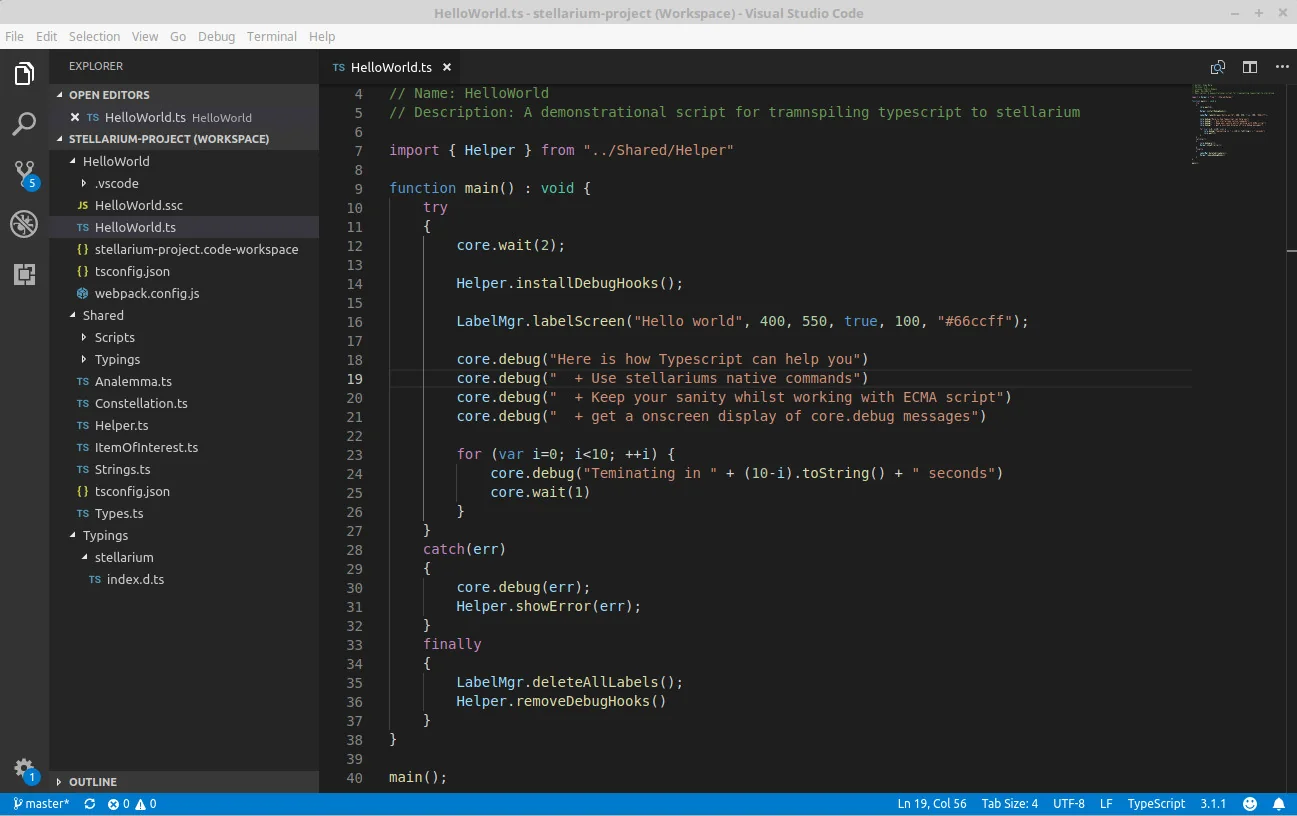
Here is how a minimalistic example of Stellarium Typescript code looks like:
// Author: Ingo Berg
// Version: 1.0
// License: Public Domain
// Name: HelloWorld
// Description: A demonstrational script for tramnspiling typescript to stellarium

import { Helper } from "../Shared/Helper"

function main() : void {
	try
	{
		core.wait(2);

		Helper.InstallDebugHooks();

		LabelMgr.labelScreen("Hello world", 400, 550, true, 100, "#66ccff");

		core.debug("Debug Output:")
		core.debug("  + Control Stellarium with Typescript!")
		core.debug("  + Keep your sanity whilst working with ECMA script")
		core.debug("  + get a onscreen display of core.debug messages")

		for (var i=0; i<10; ++i) {
			core.debug("Teminating in " + (10-i).toString() + " seconds")
			core.wait(1)
		}
	}
	catch(err)
	{
		core.debug(err);
	}
	finally
	{
		LabelMgr.deleteAllLabels();
		Helper.RemoveDebugHooks()
	}
}

main();
This article will focus on setting up the "Typescript For Stellarium" toolchain for an Ubuntu based Linux system as well as for the Windows 10 Operating system.
First and foremost you should install the current versions of Stellarium and Visual Studio code.
Furthermore the Typescript transpiler (> 3.0) is needed for transpiling the typescript source code into ECMAScript and Webpack is required for bundling it into a single file.
The following instructions will install the required packages. Please note that some of the packages will be installed to the local users home directory! After executing the commands you will find a newly created folder named "node_modules".
# Install npm and typescript
sudo apt install npm            # may already be installed
sudo npm install -g typescript

# Install webpack and ts-loader in the user home directory
cd ~
npm install webpack webpack-cli --save-dev
npm install ts-loadernpm is part of node.js. Get the node.js installer from https://nodejs.org. Then install typescript, webpack and the ts-loader locally:
cd %HOMEPATH%
npm install webpack webpack-cli ts-loader typescript --save-dev
Once you have installed Visual Studio Code, Typescript and Webpack you can start with creating Stellarium scripts in Typescript. Continue by downloading the sample projects from github.
Sample ProjectsEach typescript project consists of the files and folders listed below. The easiest way to create a new project is to copy an existing one.
The shared folder is located at the same level as the project folders. It contains supplementary typescript classes used by the sample scripts as well as the Typescript declaration file for the Stellarium-Scripting-API. This file is telling Typescript and Visual Studio Code which functions are supported by Stellarium and how their definition looks like. At the time of me writing this article the file contains most, but not all Stellarium functions.
Please note that Stellarium script API functions which are missing in this file will be marked as syntax errors in Visual Studio Code but the code can still be transpiled.
In Addition the Scripts subdirectory contains bash (Linux) and powershell (Windows) scripts which are required by Visual Studio Code for launching Stellarium.
A project is opened by loading its workspace file into Visual Studio code. All sample projects use identic workspace files. The workspace file is named "stellarium-project.code-workspace".
 The "Hello World" workspace
Once you have opened a workspace you can build and execute it by pressing "Ctrl + B". You have two choices: "Execute Stellarium Script" and "Build Stellarium Script". The first option will launch Stellarium with the current project being its startup project. The second option will transpile your typescript code into a single Stellarium file. The output file will be named like your project folder with the extension SSC appended.
 Press CTRL + B to open the build options menu
The build process will create a stellarium script file that is named after the project folder with the extension ssc added.
When the build option "Execute Stellarium Script" is selected the output file together with the optional assets folder is copied to the local stellarium script folder and stellarium is started with the script as its startup-script.
You are now ready to start coding in typescript for Stellarium. If you are serious about Stellarium scripting I highly recommend switching to Typescript. Give it a try you will not look back.