How "Terra-X" a documentary format by german public service broadcaster ZDF failed at flat earth debunking.

The main goal of limiting the exposure time is avoiding or at least reducing star trails. As a common rule the maximum possible exposure time should be limited to a single digit second number. The exact value depends on the focal length of the objective and the distance of the motive from the northern star. A commonly cited rule for suppressing star trails is the so called 600 rule (Sometimes also 500 rule): $$t_{min} = \frac {600} {c*f}$$ with
| Focal Length in mm | Recommended exposure time in seconds | |
|---|---|---|
| APS-C (Crop=1.6) (z.B. EOS 50D, EOS 60D, EOS 7D) |
Full Frame (z.B. EOS 5D, EOS 6D) |
|
| 24 | 15.6 | 25.0 |
| 35 | 10.7 | 17.1 |
| 50 | 7.5 | 12.0 |
| 100 | 3.8 | 6.0 |
| 135 | 2.8 | 4.4 |
| 200 | 1.9 | 3 |
| 280 | 1.3 | 2.1 |
| 300 | 1.25 | 2 |
| 500 | 0.75 | 1.2 |
| 600 | 0.62 | 1 |
The exposure times listed in the table above aim at completely eliminating star trails. In reality short star trails can be removed with a bit of loss in image quality. Unfortunately some stacking programs have problems working with high noise images that contain star trails. If you experience such problems try stacking with another program (i.e. Fitswork) which might allow manual correction of the stacking result.
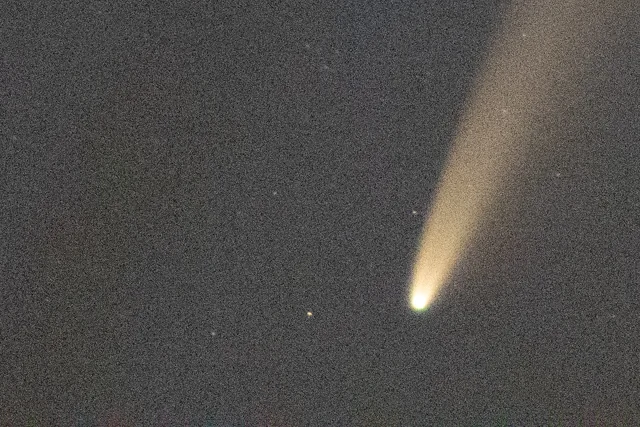
 Comet C/2020 F3 (Neowise) at 200 mm focal length with 1.6 s exposure time on a APS-C sensor. Star trails are hardly visible.
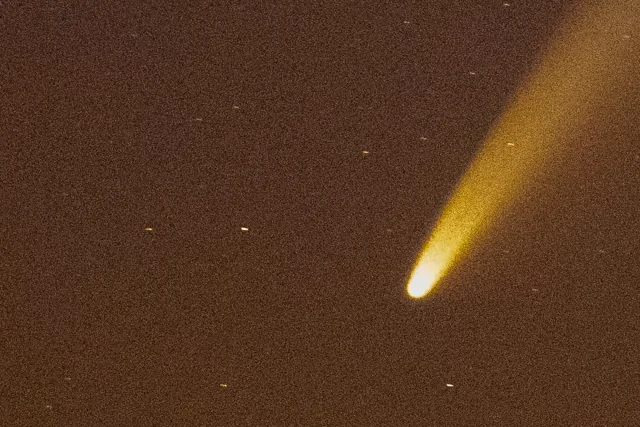
 Comet C/2020 F3 (Neowise) at 200 mm focal length with 4 s exposure time on a APS-C sensor. Star trails are clearly visible.
The angle of view is related to the sensor size and the focal length of the objective. Telephoto lenses have large focal lengths (200 mm - 400 mm) allowing a good magnification whilst wide angle lenses have a small magnification but a wide angle of view. The following table gives an overview over the image angle of commonly used focal lengths:
| Focal Length in mm | Angle of View | Motives | |
|---|---|---|---|
| APS-C (z.B. EOS 50D, EOS 60D, EOS 7D) |
Full Frame (z.B. EOS 5D, EOS 6D) |
||
| 24 | 58.1° | 84.1° | Wide Angle (z.B. Milky way) |
| 35 | 41.7° | 63.4° | Constellations (z.B. Orion nebula) |
| 50 | 29.9° | 46.8° | |
| 100 | 15.2° | 24.4° | Constellations, Large nebulae (i.e. North America Nebula) |
| 135 | 11.3° | 18.2° | |
| 200 | 7.6° | 12.3° | Galaxies, Planetary nebulae, Globular clusters (z.B. Andromeda galaxy, Orion nebula) |
| 280 | 5.5° | 8.8° | |
| 300 | 5.1° | 8.2° | |
| 500 | 3.1° | 5.0° | |
| 600 | 2.5° | 4.1° | |
Since most astronomical objects are very dark you need a wide opening to gather as much light as possible. Usually using an aperture of f/2.8 is recommended. Unfortunately most lenses show their weakness when being operated fully open. For this reason it is often better to stop the lens down a f-step. Using lenses darker than f/4.5 is usually not recommended for untracked astrophotography.
Due to earths rotation the stars seemingly move across the sky. As mentioned above short exposure times are a mean for suppressing star trails. The downside of short exposure times are underexposed images with a reduced dynamic range. Increasing the ISO settings will help to avoid underexposure and thus the related loss of image dynamic range.
As a general rule the ISO settings should be set as high as possible (> ISO 1600). The only rule is that the motive should not be overexposed. If you take orion for example make sure the stars inside the nebula are still visible and not washed out due to overexposure. it is important to know that high ISO values will also amplify the image noise. The resulting frame is usually extremely noisy but it is important to understand that noise can be dealt with by stacking more images. Missing image information due to a reduced dynamic in the image cannot be fixed later on.
A camera suitable for untracked astrophotography should be capable of shooting in manual mode. Usually the manual mode is selected by turning the camera mode selector wheel to the position labeled with the letter "M". In manual mode the operator has full control over exposure time and aperture settings.
Untracked astrophotography requires the use of the so called RAW mode for saving image files. Jpeg compressed images are not suited due to the lack of color resolution. This is caused by the formats limitation to using 8 bits per color channel as well as the introduction of artificial image errors due to the compression algorithm. In Raw mode 12-14 bits are used for storing image data per color channel and no compression takes place.